Tuesday, December 27, 2016

DIY Laundry Pre-Treat Options

Three Reliable Ways To Get Stains Out


I had so much fun telling you all about some of the fun things I made as Christmas gifts (fizzy bath salts, peppermint sugar scrub, decongestant shower melts and wax melts) that I thought it would be fun to share with you some of my favorite homemade cleaning supplies!


I've had my most recent adventures making my own pre-treat laundry spray. I will first advise you to stay away from any recipe that mixes hydrogen peroxide with baking/washing soda and tells you to put it in a spray bottle. The washing/baking soda will react with the peroxide, expand, and then the liquid starts spraying, almost magically, out.  Mind you, this will happen long after you've left the room. You'll just come back to a film-y mess.

This is a great pre-treater, especially for protein stains, though. It's that chemical reaction that works so well getting out the stain so you don't want it sitting around anyway. If it's not too difficult for your lifestyle you can mix it up on an as-needed basis. 

Explosive Laundry Treatment!


  • 2 parts water
  • 1 part washing soda
  • 1 part hydrogen peroxide

Soak stain thoroughly in treatment for roughly 20 minutes and wash as usual.

That doesn't, personally, suit my lifestyle. I like something that's easy to grab when I need it. I was even willing to spend extra time putting a recipe together if it meant it would be ready to use when I needed it. After some research, additions and a fun name I'm using the following recipe. It has a couple of ingredients you might not have in the house, but since you'll be able to make multiple batches, I think they're totally worth it.

Bellow!

  • 2 cups water
  • 1/4 cup liquid castile soap (Dr. Bronner's is great and readily available)
  • 1/4 cup liquid glycerine (any drugstore)
  • 2 tablespoons baking soda 
  • 1 tablespoons washing soda (in the laundry aisle at most grocery stores)
  • 10-15 drops lemon essential oil (I use NOW)
In a pan mix the baking soda, washing soda and water on high heat. Stir continuously until powders are thoroughly disolved and water appears clear. Allow to cool before adding the rest of the ingredients.  Pour into a spray bottle and spray onto stains 10 to 15 minutes before washing. Swirl/shake before using.

I love this! It makes a reasonably large supply, doesn't require any weird storage and smells amazing. The lemon essential oil is for cleaning as well as fragrance so while it can be omitted, it's not interchangeable with any other essential oil.

If you're not already a DIYer this may seem like an expensive route with a lot of ingredients you don't use or have on hand. While it winds up being less expensive in the long run there is a certain upfront investment. I can assure you all that I want that you'll find other uses for your essential oil or that you'll be amazed at how much you'll use your bottle of Dr. Bronner's liquid castile soap, but buying all that may not suit your wallet right now. I get that.

For that reason, I'll introduce one more idea. It's cheap, easy and environmentally pretty sound.
 

Cheap & Easy Stain Fighter

  • 1 Bar Laundry Soap like Fels-Naptha or Zote (Zote being more environmentally friendly but you can always use Kirk's Original Coconut Castile Soap if you keep it vegan at your house)
  • 1 Pretty Soap Dish
I like to keep the soap in the plastic netting that some produce (like onions or lemons) come in, for a little extra scrubbing power.

You'll need to get the bar a little wet to get the lather going and apply it to a stain, so if you don't have a nearby sink keep a spray bottle with water in it. That's it!

I've always liked the idea of starting with the money saved with one DIY and using those savings to buy some of those investment items. For instance, taking the difference in price between a bottle of, say, Shout and a bar of Fels-Naptha and putting it in a little change purse. When the change purse has enough in it use that money to buy a big container you'd need for DIY laundry detergent, buy that. When you would ordinarily have to buy more detergent (the recipe I use makes enough for over 250 loads at a price that's comparable to a big bottle of Tide) put the money you would have spent on it in your change purse to save up for the next little investment product.

I've had to live on a very strict budget before, so I still sometimes cringe paying almost $10 for a tiny bottle of essential oil or pacing up and down the aisle at Wal-Mart (a store that I don't feel good patronizing to begin with) trying to justify spending $5 more on the pretty glass jar than the functional plastic bin.

Those are my three pre-treatments. Hopefully one will suit your needs.

I hope to go through all of your laundry options soon. Going soup to nuts from pre-treat to dryer balls.


*****Since taking the above photos I've started putting Bellow! into an old glass vinegar bottle with the sprayer from the bottle pictured screwed on it. It fits perfectly and I'm much happier with it.

Small for You, Big for Me!

So much has changed! In classic Katherine styling I've been working different recipes and writing up blogs to accompany them. Some I'm perfecting the recipe before putting it out there, others lack pictures. (Hopefully, I'll put out a series of blogs on laundry and do-it-yourself products that I've researched, made and used by years end!)

Bigger than that, for me anyway, I met someone. I know! Almost 40, never married, set in my ways and I managed to meet a nice man that doesn't feel at all like a compromise.

If you don't know me, I'll give you a little hint of how comfortable as a singleton I was.  I posted this exactly five days before meeting Ben:

I was laughing for a few days about how funny and happily single I was. I was. I like not having to answer to anyone and the idea that I could take off on a moments notice. (Which is still true. I'd never considered that you could be involved with someone and still have those things.)

About a year before that I was watching a romcom and when the leading man got down on his knee to ask her to marry him I, without thinking, yelled "Don't do it!" at my television. It's a funny story, but I was a little embarrassed when it happened. (Ok, mostly because of the whole yelling at my TV thing.)

Now, I'm not saying that this is the love of my life, or my soulmate or any of those other ridiculous things I don't believe in. (Sorry, not ready to be a romantic quite yet.) But we are kind of insanely happy together. We're planning to move in together (way too soon). So, you may be seeing some lovely Ikea hacks or fun flea market finds. (We'll see. Recently I've only found boiled peanuts and orange soda at the flea market.)

Ben is lovable and funny and almost completely onboard with my new mantra "plastic free by 2023". (He's only about 80% onboard, but I only want to be about 90% plastic free so it may work.) He wants to raise chickens for eggs and is interested in ethical meat sources. (Do you think I could eat my own chickens? I'm not sure.)

Best news? He loves dogs.

It's all golden now. I know. Wait a year, you say. With complacency you'll each see what the other is really all about and then you'll feel differently. You're probably right. I'm just going to take this time, make it last as long as possible and enjoy it as much as I can.

I was in such a hurry when I was younger. I wanted to just be married already and start having kids. Now I just want to make this part last forever. It's not realistic and the day will come when things change and I'll try to enjoy that as much as possible when it comes.

Saturday, March 12, 2016

Sauna Etiquette

Going for a Shvitz

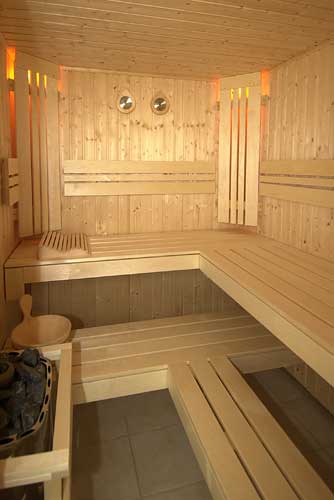
File:Sauna 2.jpg
After a week of hitting the sauna at my local YMCA I'm a little disappointed. Not in the sauna experience! It's pretty wonderful and I suggest everyone try it, health permitting. I'm disappointed that so many women don't get that there are rules. I'm not talking about "soft rules" like not listening to music or talking (although I'll touch on a couple of these) but the hard rules about hygiene.
Before I went to the sauna I did a little reading.  My favorite was this how to, which I highly recommend but seemed a little male oriented. I thought we needed some more feminine guidelines. I'll not bore you with the basics like don't drink and sauna or sauna when pregnant, as that's printed on the doors of most public saunas.

When I go for a shvitz (it's Yiddish for "sweat") I like to look a little glamorous. I wrap myself in a towel and put my hair up in a terry cloth headband like I'm at a fancy spa. (Remember to take all your jewelry off.) No underpants, but I never take the towel off. I'm shy like that, but also, my gym has a rule. Always wearing a pair of shower shoes or flip-flops. (Saunas are the perfect temperature for foot funk, so you don't want to turn your sneaker into an incubator or catch it from someone else.)

Maybe you're a little more casual than I and wear old biking shorts and a tee with your hair up in a ponytail (no metal clips or such). That's fine, just make sure they're clean and not the ones you just worked out in.  The same is true with a swimsuit. This is where a hard rule comes in. You must be clean when you go in the sauna! Take a quick rinse off in the shower if you've just been in the pool, working out or even are just wearing a lot of lotion or perfumes. Try to keep outside smells and toxins out for the long term health of the sauna.

You're gonna need towels! Towels to wrap around you, towels to sit on and towels to dry off with. (Again, clean and not full of chlorine from the pool.) Goodness knows what a pain this can be if your gym doesn't provide towels. You can choose to sauna in something other than a towel but you must sit on one. Don't leave behind a sweaty butt print. On the bright side, it doesn't have to be a full sized towel. You can sit on a nice hand towel to lighten your laundry load.

You really should bring a clean towel for showering off after, though. One of the many reasons to sauna is to help your body get rid of toxins through sweat. You don't want to get them out just to rub them back all over your skin. (I even use a mild soap during my after-shower.)

Are you lucky enough that you find yourself frequently in the sauna by yourself? I'll admit, I am.
Because I am alone I feel free to bring a little bad new-age music with nature sounds. It is my secret shame. (Generally, I like heavy metal.) I'd never do this if people were there. Even with headphones it can disturb someone else. 

If you have the opportunity to do this always be respectful of others. While I doubt anyone is going to go into an Enya induced rage, you should still turn it off the moment someone else enters. Use an old iPod or even a discman. Something that you won't be overly upset if it doesn't survive the heat. Really, other than this specific circumstance, there is no reason to bring any electronics into a sauna.

Do you find yourself often in company? Generally saunas are thought to be a "quiet place". Somewhere to turn off the chatter and be a little introspective.  Don't feel the need to fill the air or look at others with a critical eye. You should be too hot for any of that anyway.

Conversely, you may find that your sauna is the chatty type. If you find yourself walking in to find conversations, just make the best of it. Giving side-eye and clucking at strangers is not conducive to a good experience for anyone. 

Saunas, strangely, seem out of fashion now. Fewer gyms have them and those that still do find them empty a good portion on the day. Once you go, it'll be hard to understand why anyone ever stopped. Twenty minutes in a sauna is life changing. I never come home from one and don't daydream about building one in my backyard.

Thursday, December 24, 2015

Peppermint Sugar Scrub

I need to warn you up front that I cannot guarantee my proportions here. I know there are only four ingredients but not so long ago I decided to make my own liquid castile soap from a bar and, while I've used it in other recipes that I use personally including this one, it went kind of sideways. It's kind of lumpy and weird, but it still makes a nice lather. I know, who'd have guessed I'd have problems with something like that? (You know, other than everyone who's ever met me.) In the long run, I blame trying to make too large of a batch the first time out.

But I digress. This recipe is small batch, requires few ingredients and is easy to manipulate to your own desires.

Let's start with the most basic recipe:

2 Tbsp coconut oil
2 Tbsp liquid soap
1 Cup sugar
3 drops essential oil (obviously I used peppermint)

 Mix thoroughly. 

That's it! You're done. Except I haven't told you what kind of liquid soap, or for that matter sugar, to use. In truth, any. You may wind up needing more or less sugar, but not by much.

I used my "homemade" liquid castile soap so I tend to think of a liquid castile first but you could use an inexpensive liquid face soap or even just baby shampoo. Some versions I've read of this recipe skip the soap all together and just used 1/4 cup coconut oil.

 I also used a regular bag of white sugar and while I can't think of a reason to use anything else, my lack of imagination shouldn't limit anyone.

I thought about other fragrances and I like the idea of a more lively scent for a scrub. Something to wake a person up a little. If you're using a scented soap, you may opt to not add any essential oil.

This shouldn't be liquid-y at all. It will have a nice light consistency and be reminiscent of snow. That may mean that it's a struggle to properly fill a jar, but if you're doing anything resembling pouring it, you need more sugar. If the sugar melts in the liquid, it will stop being a scrub and just be goo.

This was the last project I finished before Christmas and they made for such a jolly little gift! (I'm enjoying the jar I made for myself, as well.


 Try some of my other DIY Christmas gifts

Decongestant Shower Melts
Decongestant Wax Melts
Fizzy Bath Salts

Fizzy Bath Salts!


Why didn't I do this first? This was a clean, easy and cheap little project that I feel is certain to be enjoyed. 

You need very little:

  • 2 cup Epsom Salt
  • 1/2 cup Sea Salt
  • 1 cup Baking Soda
  • 1/2 cup Citric Acid (at the supermarket or hardware store in with the jarring supplies)
  • Food Coloring (I like 8 drops red, 4 drops blue)
  • 25-30 drops Essential Oil of Your Choice (I used lavender with a few drops of either sweet orange or peppermint)

First, I mixed these ingredients up in a large bowl until the color and consistency was about even. (Perhaps too even. As I look at photos from other bloggers I kind of like the flecks of color.) Then I sealed it in a large jar for a day or two so the smell would be even throughout. Finally, I packaged it up in fun Christmas themed mason jars I'd just gotten from Dollar General for $1 a piece.
There are certainly mistakes that could have been made, but I didn't make them. (For once.) I happened to have quite a bit of sea salt on hand and the citric acid was easy to find.

Leave a little room at the top of the jar you're ultimately storing them in. The top layer tends to get a little crusty and you'll appreciate the ability to shake it up a bit.

I did try to take the last couple tablespoons and  make these cute little bath bombs that everywhere I was reading said it was totally possible. I put the salts in one of my silicone cupcake molds, sprayed with a little water and pressed down on them. Not a success.

I hope my next couple projects go as well!


Check out my other DIY Christmas gifts

Decongestant Shower Melts
Decongestant Wax Melts
Peppermint Sugar Scrub

Tuesday, November 10, 2015

Decongestant Wax Melts

This is actually the item that got me started on the idea of a DIY Christmas. I was just happily scrolling through my feed on Facebook one day when I saw an image very much like this:
Now, there was something about this that I liked, but also something kind of disturbing. Put a petroleum based medicine in water, leave it on an open flame in your baby's room then close the door and wish them the best of luck? Yeah, no.

A little research and I found out two things very quickly. 1) Vicks VapoRub is not intended for babies and it's actually harmful to them. 2) The good people at Scentsy hate this idea and will void the warranty(?) on your warmer if you try but have a similar decongestant melt they'd be happy to sell you. I, however, was not deterred.

The season was changing and in spite of high humidity I was really stopped up at night. So, I ran over to the local Family Dollar and bought a generic warmer. At first it totally worked. Kind of. I mean, if you're ok sleeping next to a lit candle. Then after a few hours I woke up to some popping noises. I didn't see anything and there were no marks of where the oil had popped up out of the warmer, but I was not comfortable trying that again when I went to bed.

Rather than just putting it in the lose column I really went down the rabbit hole. I took a tea light out of it's tin cup, removed the wick, then put it and a teaspoon of Vicks in the warmer. Eureka! After a few hours sitting next to me while I studied it gave off a pleasant, decongesting aroma and remained stable, without any pops or splashes.

This gave me some hope, so I got a wax melter nightlight. We all know where I went to get it. I went into the heart of darkness. The evil empire. Walmart. I'm never proud of my decision to shop there (a subject I'll surely revisit at a later date) but I knew that I could find this weird little item quickly, easily and cheaply.

As I was using it, though, I was still reading. I was not the only one who'd discovered this trick and a lot of people had blogged about it. Many had small children and were using Baby Vicks or mixing their own essential oils. I'm not sure exactly when or how, but as I was starting to think about what I was going to do for Christmas gifts I decided to go natural and get some essential oils. So, the ideas merged. 

I stopped by Family Dollar again and picked up a great little ice tray for only $1. It's a little different from the average ice tray. It has a rounded, silicone bottom that you push up on to release the ice and I think I'm in love with it. So, with much less thought than I should have used, I started in on this.

As one blogger had used a large, religious style, candle in a glass container I decided that would be fine. Sure, it takes a while to melt but they're unscented, cheap, readily available and I wouldn't need to get out the double-boiler. This, kittens, was a terrible plan.

Almost as soon as I got it home I started thinking about how on earth I was going to be able to pour hot wax out of it? I put off starting this project just to avoid dealing with it. I probably should have not attempted it. Instead I sat the candle in a pot of hot water on the stove and prepped everything while I waited.

I washed and dried my new little ice cube tray then put four drops of each of the following essential oils in it:

Tea Tree
Eucalyptus
Peppermint
Rosemary

Since I was working by myself I thought that putting the oil then wax in would be better than wax first. I didn't want to be playing "Beat the Clock" trying to get the oils in before the wax dried.

If you're thinking about making these yourself, you can certainly alter the line-up of oils. Some people like to use lemon or wintergreen to replace rosemary and peppermint respectively and the amounts are completely up to personal taste.

When the wax melted I took a deep breathe, braced myself, and with an oven mitt on each hand pulled the candle out of the pot and began pouring it into the ice cube tray. The wax got everywhere! Only now some of it had overflowed the ice compartments so it was oily wax. All. Over. The. Counters. There are no pictures of this. I just had no time. I was too busy wiping up wax and shouting profanity.

After a significant amount of cleaning
How else did I think it was going to work? Any sane, rational person when they realized how unwieldy an eight inch tall, glass cylinder with a squared lip was going to be, would have rethought it. Not me. I need to make the mistake before I see the solution. 

On the bright side, the ice cube tray was perfect! The ice compartments themselves each hold about one tablespoon and when it cooled off and I was able to chip the extra wax off the top, they came out nearly perfect. Only a couple had a slight fault, which surely had more to do with the big waxy mess than anything else. In two the oil and wax hadn't mixed together properly and so the top (what had been the bottom as they were drying) never solidified fully. The rest looked perfect, but due to losing so much oil in the waxy mess, weren't very potent.

My second batch, I obviously needed to find a better source of wax for. It should be unscented but the color can be anything. After some thought I went in hunt of an unscented pillar candle that I could grate (my mother later recommended putting it in a plastic bag and wacking it with a hammer) into my Pyrex measuring cup (that has a spout!) and I placed it into a hot water bath to melt the wax. Simple plan!

Unfortunately, it is really hard to find a big unscented candle these days. Know what's easy to find? Unscented tea lights. They're all over the place and super cheap. I got a big bag of 30 for $2.

I figured since each compartment holds one tablespoon and there are 21 compartments in the ice cube tray that I'll need just over 1 1/4 cup to fill the tray. I could melt the tea lights just a few at a time until I had that amount so that I'd waste as little as possible.

A quick search on The Google told me that one liquid teaspoon is the equivalent of just under 100 droplets. That measurement seems quicker to get and a bit stronger than the first batch. So, I knew my measurements which felt like half the battle.

Everything went according to plan! I was able to use a low pan that the handle of my Pyrex measuring cup went over, which meant the handle remained a reasonable temperature and I could hold it without a even an oven mitt.

The oils measured nicely and stirred in smoothly after the wax melted. (I was sure to take off the plastic top that pours by the drop. That would have taken too long.)

When it was time to pour, it was a dream! I just picked up the measuring cup and started pouring with hardly any overages.

I did find that I had a little too much wax. (Evidently, my math is not as good as I think it is.) I got out my trusty silicone cupcake tray and poured a few extra in there. I'm still not sure if those can are better as gifts or keeping for myself.

Since I used the same cupcake mold to make my decongestant shower melts and these are likely to wind up in the same gift package, I think having a different look might be important, but the symmetry of having them look alike, since they're both decongestant, has an appeal too. Ultimately I'm deciding against it because they are a little to wide to fit in the nightlight wax warmer and wouldn't want that that to happen to someone I've given a gift to.

With no cleanup at all!
Waiting for them to cool they look a little shiny and greasy, but I'm taking that to mean that they'll be nice and strong. Unfortunately the melts in the ice cube tray aren't firm enough to come out in one piece, though. (The problem isn't in the silicone because it's flexible enough to peel up from around the wax.) I decided to try freezing them to see if that would help.

A few hours later they popped out perfectly! Which is nice, because not only is Christmas coming but the season of dry, forced hot air has begun in the south. Happily I can go to bed tonight with my humidifier going and one of these little lovelies melting in my nightlight.

Check out my other Christmas gift DIYs!

Decongestant Shower Melts
Fizzy Bath Salts
Peppermint Sugar Scrub

*****Only after I finished this project did I start reading about toxins and ingredient sources in candles. While I don't think that discount store tea lights are "dangerous", in the future I will either use a non-toxic, organic tea light or use the wax mix recommended by The Hippie Home Maker.  As always, I think that you should make educated decisions that are right for you and your family.


Monday, October 26, 2015

A Very Pinteresting Idea...


I've decided that this year I will have A Very Pinteresting Christmas! I have no children and most of the people of my gift list are adults and I've decided to craft all of the gifts myself. I'm a poor student so I'm hoping this will also save some money. This may get ugly, I won't lie. We've all had those, "Nailed it!" moments trying to recreate something we found on Pinterest.

Today I've decided to make something that, if it goes well, would make an excellent little gift. Decongesting shower melts. You put them at the bottom of a hot, steamy shower and as they melt, they release a wonderful smell to help clear out your sinuses. I looked at a couple of different recipes before deciding on one I liked. I'm making a small batch to try out and thought I'd take you through it. It seems very easy and if it goes well I'll look into making a large batch and packaging them up in festive holiday jars or tins.

Let me start by listing the ingredients:

Baking soda
Water
Eucalyptus oil
Rosemary oil
Peppermint oil
Tea tree oil

All of the  essential oils can be purchased for a fairly reasonable price at your local GNC. I'm sure you can do better price-wise at an online specialty store, but I'm always impatient to start a new project and love the instant gratification of brick and mortar.

Some of the recipes I read called for corn starch rather than baking soda, but this left me a little uncomfortable. Was that the type of thing that after you've used for a couple of day you find your tub draining slower? I didn't know and opted not to risk it. I decided since baking soda is a product often used in cleaning and sometimes used for clearing out a stopped up drain it was the better choice.

You start by mixing the baking soda and water at a 3:1 ratio. If you're not good at math or just never really know what that means, let me make it easier. Measure out one cup of baking soda and add 1/3 cup water. It'll be quite thick and I think a simple dinner fork is best for mixing it together. Run the tongs of the fork across the top and it'll smooth out the top, almost unbelievably.

At this point you're supposed to it put into some sort of individual containers to dry. Having read multiple directions I saw everything from large ice cube trays to paper cupcake liners mentioned and decided on a silicone cupcake tray. Well, I decided on it mostly because I saw one on sale at a second hand shop for $1.99. I am not sure if metal would work. I think it probably wouldn't. It seems to me the discs would crumble when you try to get them out of the pan. However, if the over-sized ice cube tray and silicone cupcake tray weren't options for me I would probably have gone with tin foil cupcake liners. I feel like they wouldn't fall apart when you're trying for take them off.

I filled the cupcake tray about halfway with the mixture.


After you've put the water and baking soda mixture into whatever container you're using, you need to wait a full 24 hours for it to dry. I know! In my mind I hear Tom Petty singing "The waiting is the hardest part." How, how am I supposed to not mess with it for that long?! I keep tipping the screen of my laptop down to watch it sitting there, drying. I really want to skate my fingers across the top of it to see if it's started to harden up yet. Somehow, I manage not to.

Once they dried fully I thought about how to apply the oil. How much is a bit of personal preference. Maybe you want it to be peppermint heavy for use in a morning shower, or maybe you love rosemary. I went crazy and added six or seven drops of each. They are pretty darn strong. I suspect that when I find myself a little congested these will more than do the trick.

Now, everything I read recommended adding the oil after the discs had dried and been removed from their mold, but I'm not really sure why. (Because now I have a cupcake tray that now smells like shower melts, that's why.) I decided to try a little experiment. One disc I removed from the cup and added the oils while it was in my hand. That one was a little crumbly. The second I added the oil while it was still in the cup but removed it right away to store in a sealed up glass jar with the first. It was significantly less crumbly, which got me thinking. Why couldn't I add the oil, leave the discs in the cups and let them absorb the oil fully before removing them? I added the oils and sealed the entire tray in a big, gallon sized Ziploc bag. I even put in the little bag of desiccant that had come in the glass jar I'd bought for storage.

I figured I would wait until the tops of the discs were no longer shiny with oil but had returned to the nice matte finish before I attempted to do more them. Once they were ready to remove they were the least crumbly. They were also the wettest, though, and I'll revisit the idea of desiccants later. Wouldn't want them all falling apart in there!

Almost after the fact I thought about decorating them. I was thinking of jolly little blue snow flakes. I only had food coloring gel but I thought I could draw out the edges with a pin or something, that did not work...


So, I went right out to get the liquid food coloring. In my mind's eye, I would put one drop in the center and it would spread out in a beautiful pattern.

Not so much

But that funny little dot made me think about adding other dots.

Well, that didn't really work either.


It looked significantly cuter after a couple days


After going through the entire process of making them, which really took a several days, I finally got to try one! Of course, my luck, we were almost out of hot water so my shower never got really steamy.

I gave a couple to some friends, who've agreed to be my test monkeys, and based on their reaction I'll decide whether to give these out as gifts. The making wasn't difficult or terribly expensive and even if I don't give them out, I know I'll appreciate having them when I get all stopped up this winter.

I started on a second batch, convinced that this time I have solved all of the problems. This time I added color right away. Two drops blue and two drops green to each cup in an effort to give it that aqua blue color we associate with Vicks products. I didn't waste time trying to stir in or in any way distribute the color. After the first batch I felt confident that it would slowly color the whole disc. I let the baking soda, water and food coloring dry for a full two days before adding the essential oils. I imagine that if I tried to take them out they would have just crumbled to pieces but with the first batch I'd felt like they were a little damp and I wanted the only moisture to be the oil.

Unbleached coffee filter, non-dairy
 creamer and a ribbon
In those two days I had the opportunity to research desiccants a little bit. (I became a bit obsessive about the moisture issue when I noticed some condensation on the inside of the glass jar I'd stored my first batch in.) It seems that the easiest, least expensive and most effective desiccant packets would be homemade. Just make little sachets with coffee filters and non-dairy creamer. (The powdered kind, obviously.) I read this in a crazy survivalist blog where the guy tried several different product and used staples to make his sachets. I assume that most DIYers who are interested in shower melts are more likely to tie them up with a pretty ribbon.

The second batch is really nice. There is a minor problem with the color. Coloring should definitely be added after oil. They aren't terribly crumbly, though, and since there were no experiments, I have a pretty glass jar full of them!

It's occurring to me now that they don't all have to be decongestant, either. I can make up a batch of lavender for relaxation or peppermint and lemon for energy. I'm not exactly sure how I would package different "flavors" up together as gifts but it's definitely worth a try.

Hope you've enjoyed my story and find the little lessons to go along with the recipe useful!

Here's the recipe without the story getting in the way:

Ingredients:
1/3 cup water
1 cup baking soda
eucalyptus essential oil
tea tree oil
rosemary essential oil
peppermint essential oil
food coloring

You'll also need:
silicone cupcake mold (or similar)
large, airtight storage bag

Combine water and baking soda into thick paste and divide into cupcake molds. Allow to dry for 24 to 48 hours. (48 preferred.)

To each compartment add 6-8 drops of each of the essential oils. Seal entire cupcake tray into large bag. 

After roughly 8 hours add two drops green and two drops blue food coloring to each mold and reseal into bag.

After the coloring has spread throughout your disks they are ready to remove and enjoy!

Store in an airtight container.

Check out my other Christmas gift DIYs!
Decongestant Wax Melts
Fizzy Bath Salts 
Peppermint Sugar Scrub